ImpactControlCenter will start with the Quick Setup Wizard if a device with a suitable feature set has been selected and used:
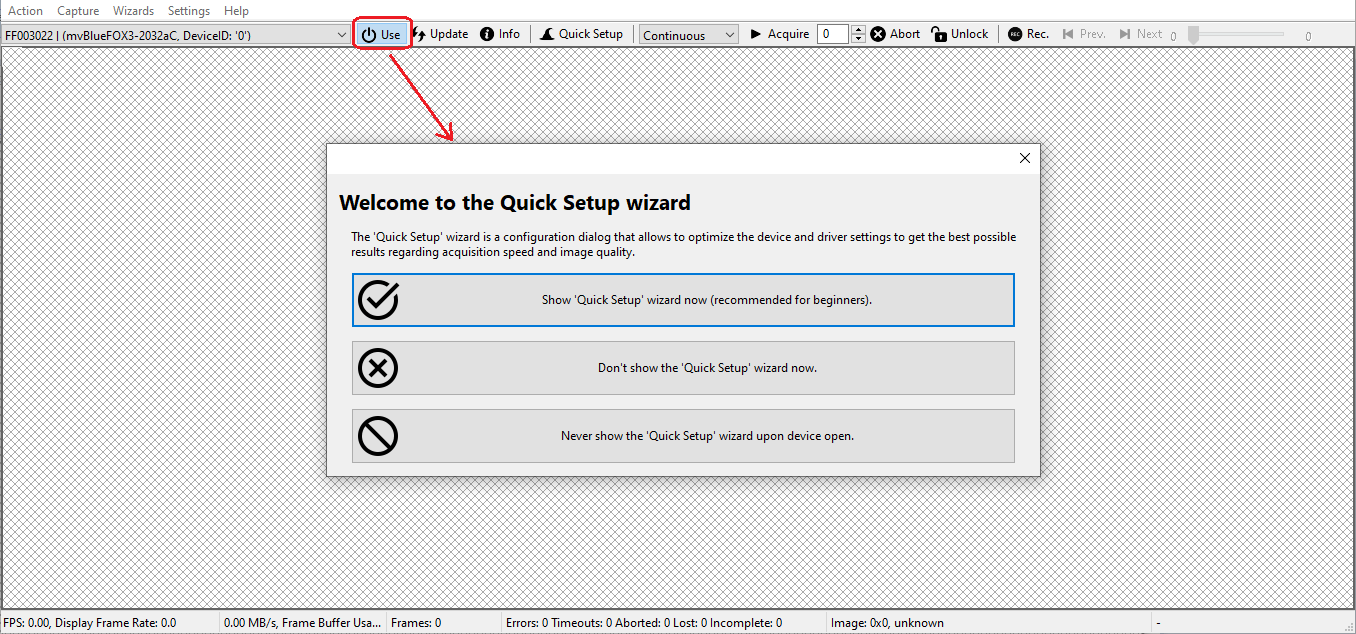
If supported the Quick Setup Wizard is the recommended way of capturing the first images. Later or when a third party device or a Balluff device without the feature required by this wizard is used when started the first time the application will look more or less like this:
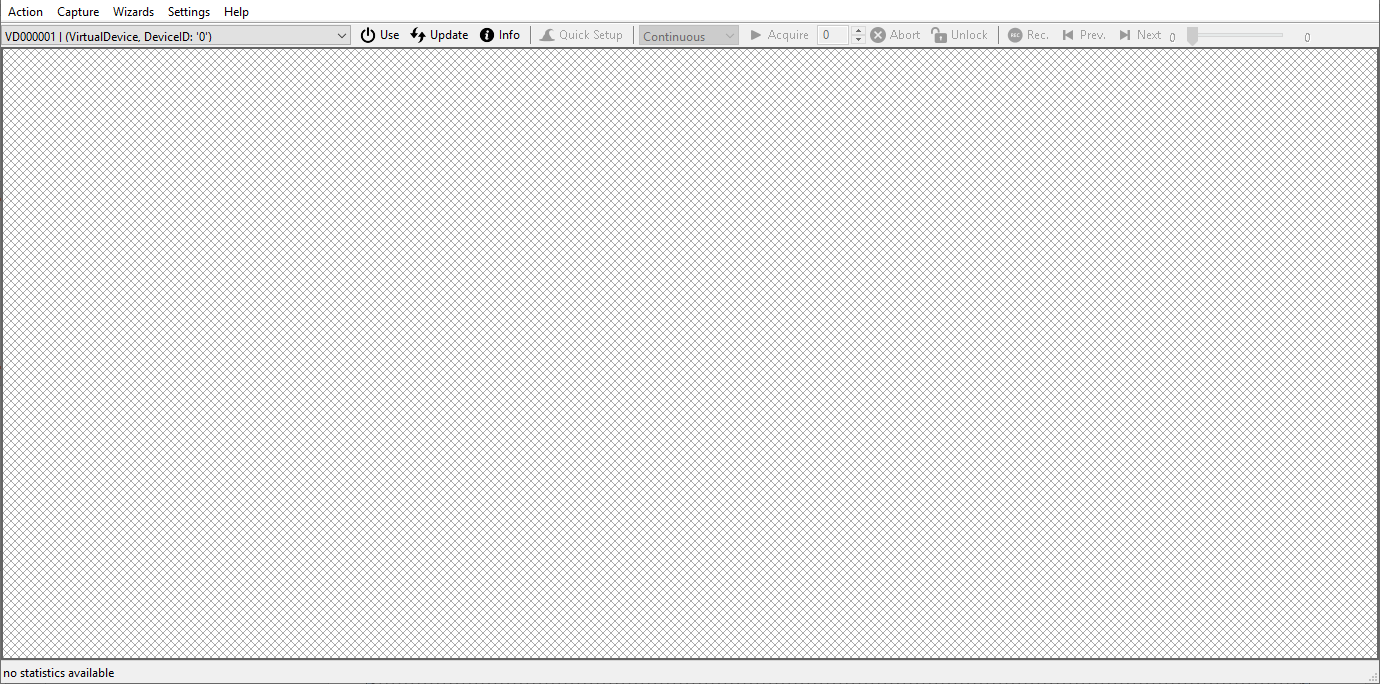
On the left-hand side of the upper toolbar a drop down box will list all devices currently recognized by the Impact Acquire framework. If you find that a device is missing first make sure that you have it's corresponding support files have been installed (e.g. by clicking on the "Info" button in the upper toolbar) and then make sure that the corresponding interface technology and the interface the device is connected to (e.g. a network card (NIC)) is enabled for enumeration. This can be seen by pressing the "Info" button in the upper toolbar. This would then open the Detailed Driver Information dialog.
To work with a device select it from the drop-down box and press the "Use" button.
Devices plugged into the system after the application has been started might not be listed until the "Update" button has been pressed. When this button is pressed every installed support library will rescan all interfaces for new devices so this will take some time.
In the middle of the upper toolbar various controls to either launch the Quick Setup Wizard or to start and stop the acquisition manually are located. In the right section of the upper toolbar recording of series of images into the RAM of the host computer can be configured. All these control will become available after a device has been initialized by pressing the "Use" button.
Enabling More Controls
Depending on your experience and/or needs you might want to see/do more than shown above. This can be achieved via the "Settings" menu:
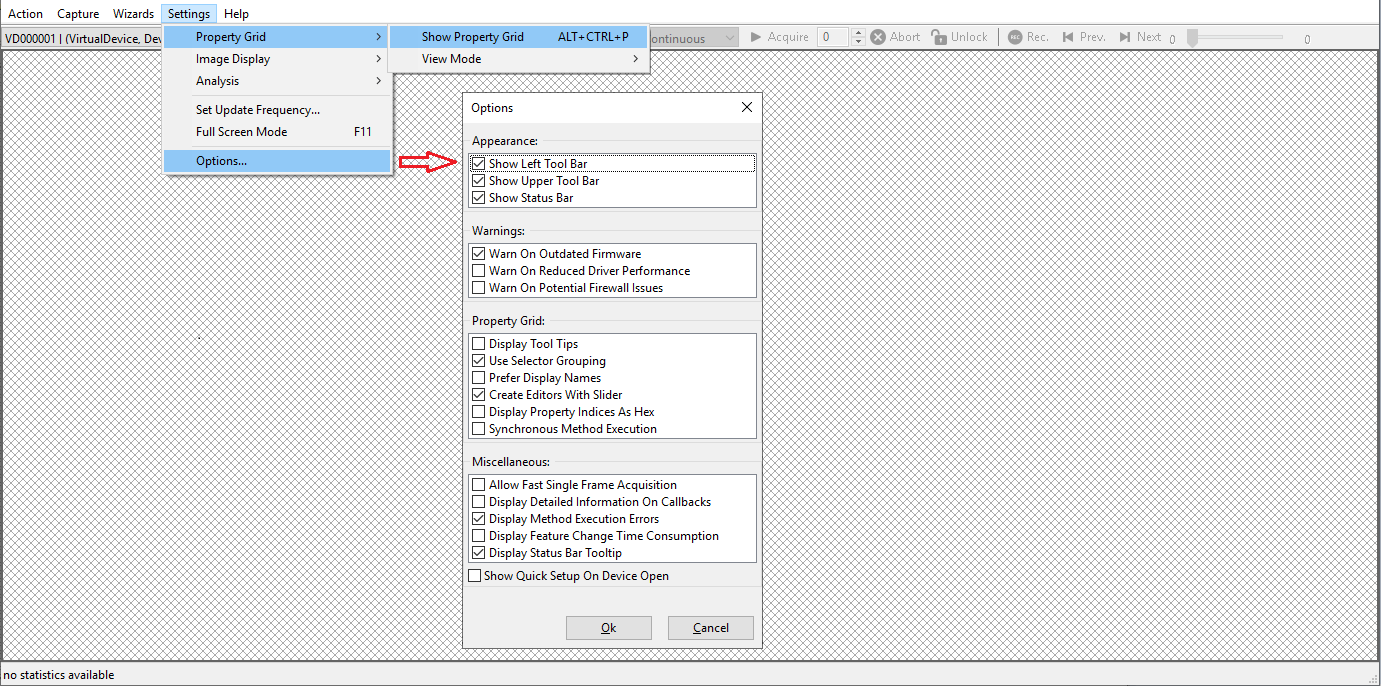
- Selecting "Settings → Property Grid → Show Property Grid" will enable the The Property Grid displaying all device and framework features on the left side of the application
- Enabling the "Show Left Tool Bar" option in the "Settings → Options" dialog will add more tools to the far left side of the application
Enabling The Image Analysis Tools
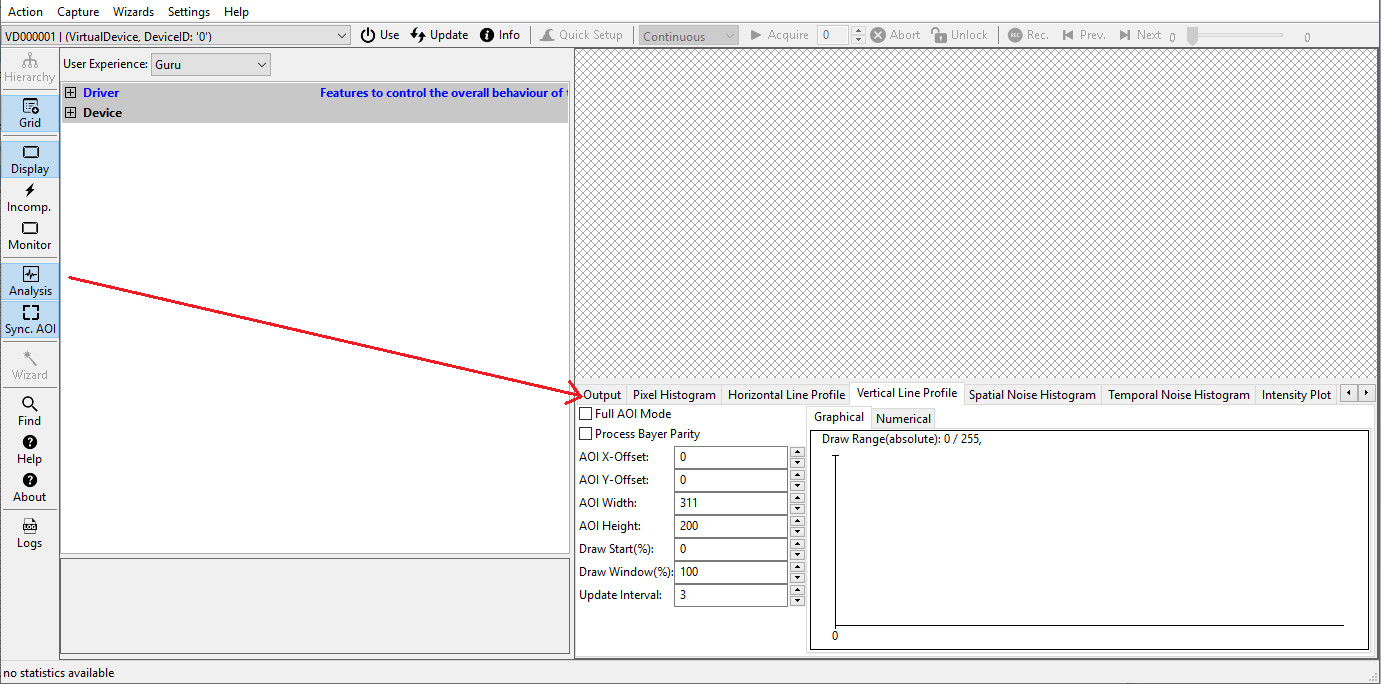
Once the left toolbar is available there is more that can be activated. The most interesting feature is probably the Image Analysis tab control on the lower right of the application:
The Big Picture
With all features enabled ImpactControlCenter then will look somewhat like this:
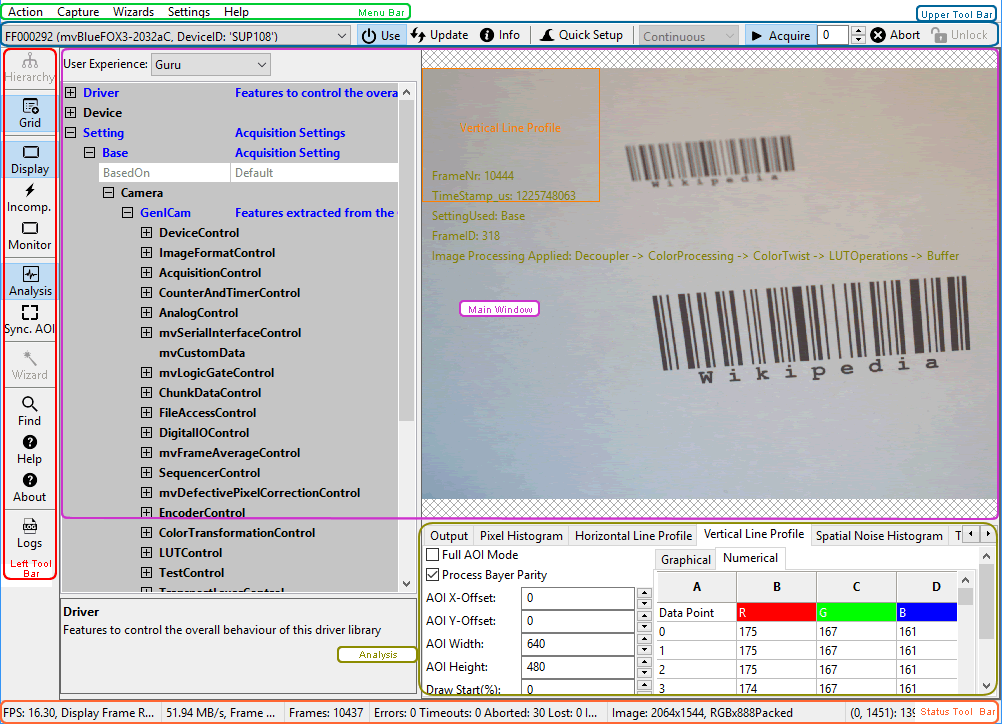
- "Menu Bar" for accessing various features not bound to any buttons or other controls
- "Upper Tool Bar" for selecting and initializing devices, start/stop image acquisition, record/play back image sequences, launching the Quick Setup Wizard and the interface configuration dialog
- "Left Tool Bar" to hide and show parts of the GUI and control various other settings
- "Status Tool Bar" for displaying various statistical information
- "Main Window" with
- the The Property Grid on the left providing access to the framework and device features
- the display area showing the current image
- the Image Analysis area allowing to look at an image's histogram and various other things
Pressing F1 will also display a detailed list of available Command-line Interface options as well as keyboard shortcuts and some other useful information!
After having successfully initialized a device the tree control in the lower left part of the "Main Window" will display the properties (settings or parameters) (according to the "interface layout") accessible by the user.
- Note
- USB3 Vision™ devices: Please have a look at the troubleshooting chapter of the mvBlueFOX3 product manual if you neither see the mvBlueFOX3 nor cannot use it (https://assets.balluff.com/documents/DRF_957345_AA_000/Troubleshooting_page.html)
