By default ImpactControlCenter will only display images when a buffer has been captured successfully. Incompletely captured buffers(e.g. due to transmission errors or bandwidth shortages) will increase the frameworks internal error counters only. These errors can either be observed in The Status Bar or by navigating to the Statistics section of The Property Grid. If for debugging purposes also incomplete buffers shall update the display, this can be configured either via the menu item "Settings → Image Display → Show Incomplete Frames" or by pressing the "Incomplete" button on the left toolbar.
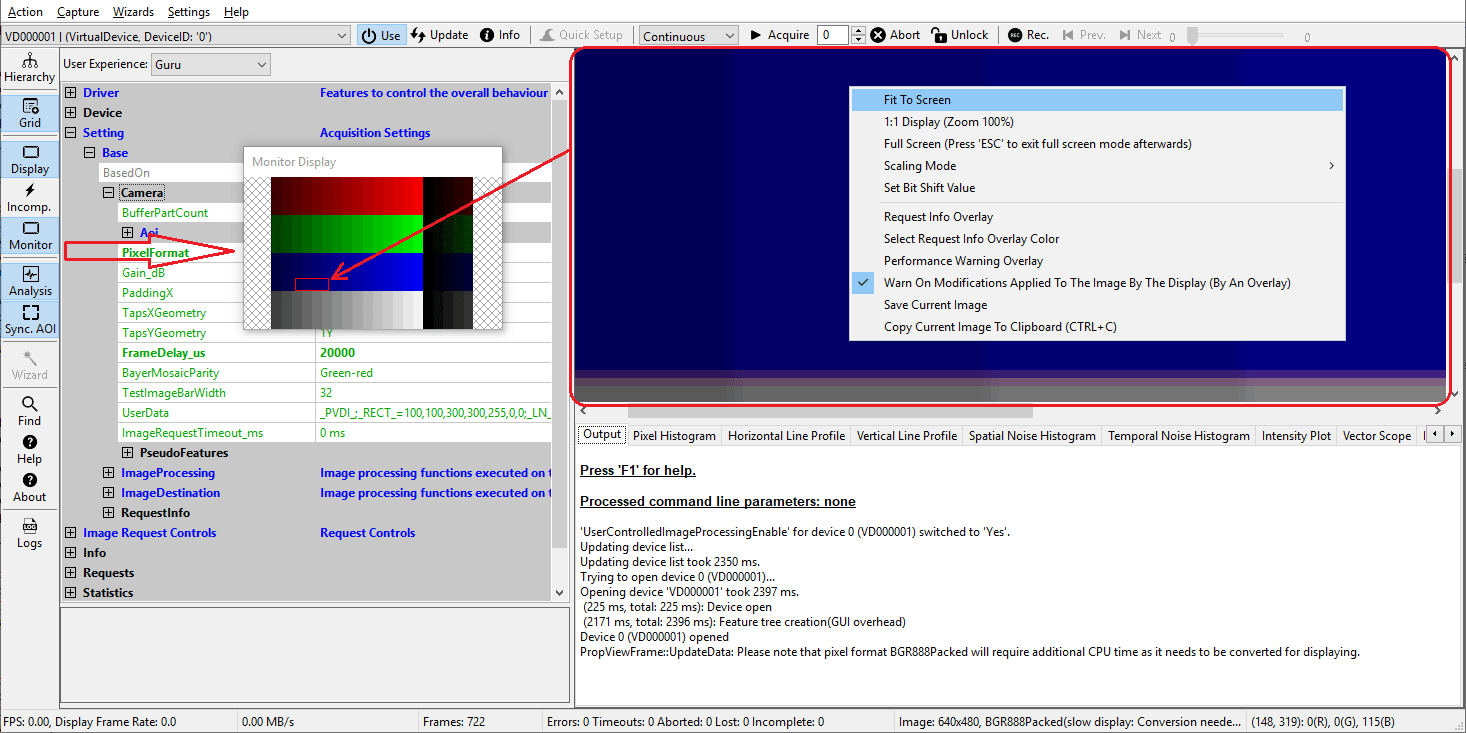
The area displaying the actual image has a zoom feature and when zooming in a lot, a thumbnail of the full image can be displayed as well by enabling the Monitor Display from the left toolbar or via the menu bar: "Settings → Image Display → Show Monitor Image". Within the monitor display the visible part of the image within the selected display will be marked then:

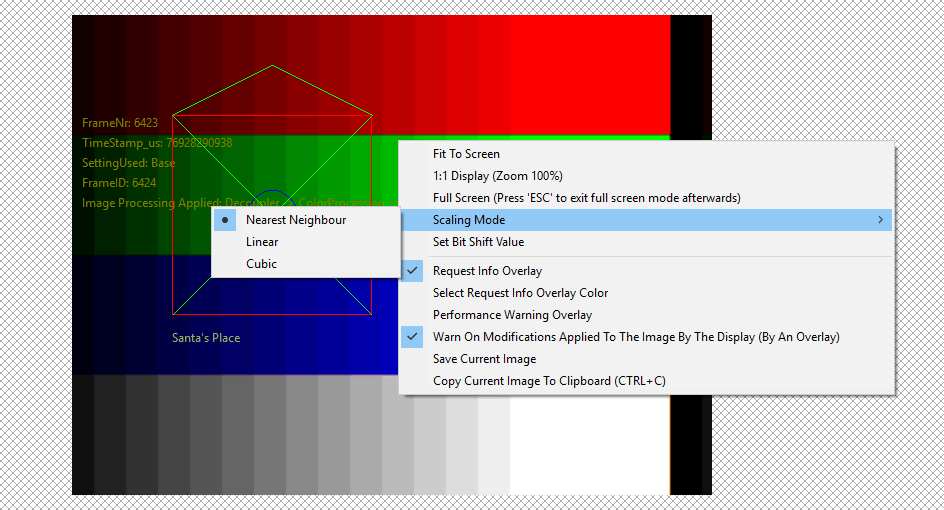
To zoom in and out of the image, the display window needs to be selected first by left-clicking on it and then the +/- keys or the mouse wheel can be used. In order to do this the Fit To Screen option for this display window must be switched off! This option as well as various other things affecting the behaviour of this display window can be configured by right-clicking on the display area.

- "Fit To Screen": Will scale the image in a way that the maximum area is occupied while the aspect ratio is preserved. With this option enabled regular zooming will not be possible.
- "1:1 Display": Will set all zoom factors back to 1. Will be ignored if "Fit To Screen" is active.
- "Full Screen": On Windows® when a continuous acquisition is running will switch the selected display window into a DirectX based exclusive window. Only the live image will be displayed than. Pressing ESCAPE will switch back to normal operation.
- "Scaling Mode": Will allow to select between different scaling options when zooming in and out of the image. All modes provide either better performance in terms of CPU usage or better quality in terms of less scaling artifacts. Which mode is best depends on the application.
- "Set Bit Shift Value": See Bit-shifting An Image.
- "Select Overlay Color": Allows to select a custom color for the "Request Info Overlay" as well as the "Custom Overlay".
- "Request Info Overlay": Will display all meta-information (e.g. timestamp, frame ID, ...) belonging to each image on top of the actual image data.
- "Performance Warning Overlay": Will display various information about potential performance bottlenecks in the current setup on top of the actual image data.
- "Warn On Modifications Applied To The Image By The Display (By An Overlay)": If active a message will be drawn on top of the image in the main display area to inform e.g. about data modifications applied to the image by the display module (e.g. bit shifting).
- "Custom Overlay": If active either a device identifier or a custom string passed via the command line for this device will be drawn on top of the image in the main display area to inform e.g. about which device did generate the current image. See Opening Multiple Devices With Automatic Switching And A Custom Overlay for details.
- "Select Custom Overlay Font": Will allow to select the font to use for displaying the custom overlay
- "Save Current Image": Will open a save dialog and will eventually store the image in the selected format to the selected location.
- "Copy Current Image To Clipboard": Will copy the current image into the systems clipboard.
