Loading...
Searching...
No Matches
Creating different exposure times for consecutive images
If you want to create a sequence of exposure times, you have to trigger the camera "externally" via pulse width:
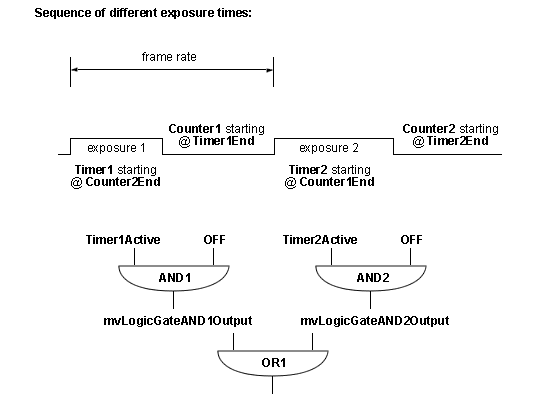
- Use Timer and Counter to build a sequence of different pulse widths.
- Use the Counter for the time between the exposures (with respect to the readout times).
- Afterwards, use an AND gate followed by OR gate to combine different exposure times.
- Note
- Please be sure that the sensor can output the complete image during Counter1 or Counter2. Otherwise, only one integration time will be used.
You can set this sample in ImpactControlCenter. E.g. the sensor makes 22.7 frames per second in Continuous Mode. This means that the sensor needs 44 ms to output the complete image.
    1
--------- = approx. 44 ms
  22.7
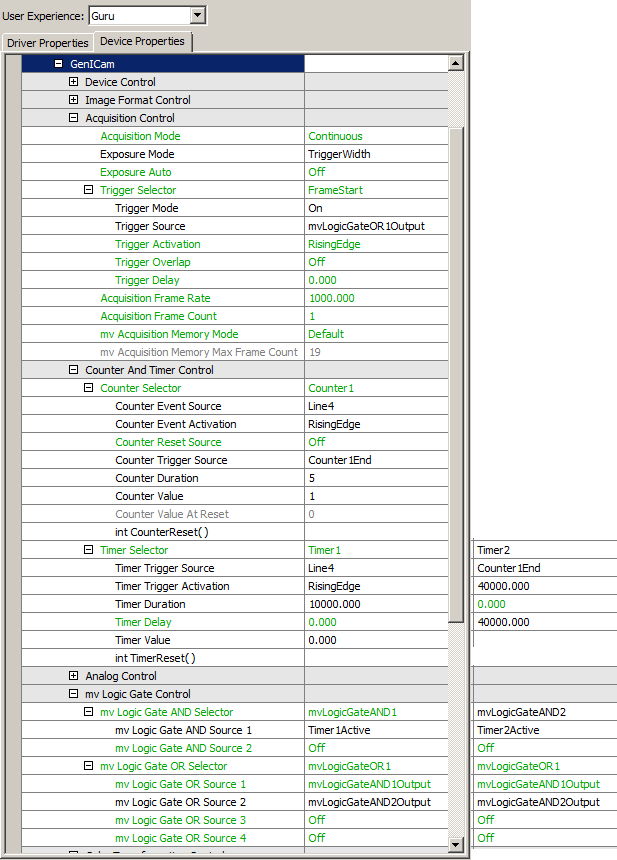
We take 55 ms to be sure. Now, as different exposure times we take 1 ms (Timer1) and 5 ms (Timer2). To get the 55 ms, we have to add 54000 us (Counter1) and 50000 us (Counter2).
Finally, you have to set the logic gate as shown in the figure:
- Note
- Because there are 4 counters and 2 timers you can only add one further exposure time using one counter as a timer.
So if you want other sequences, you have to use the counters and timers in a flexible way as show in the next sample:
Sequence with 4 times exposure A followed by 1 time exposure B
If you have an external trigger, you can use the counter and timer to create longer exposure sequences.
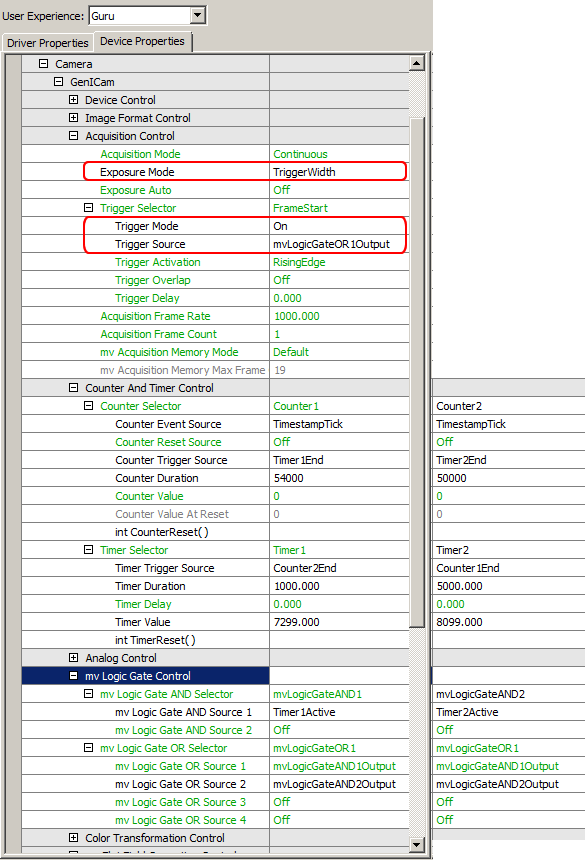
For example, if you want a sequence with 4 times exposure A followed by 1 time exposure B you can count the trigger events. That means practically:
- Use Counter1 to count 5 trigger signals then
- issuing Timer2 for the long exposure time (re-triggered by Counter1End).
- Every trigger issues Timer1 for the short exposure.
- Afterwards, an AND gate followed by OR gate combines the different exposure times.
In ImpactControlCenter it will look like this: