Exporting
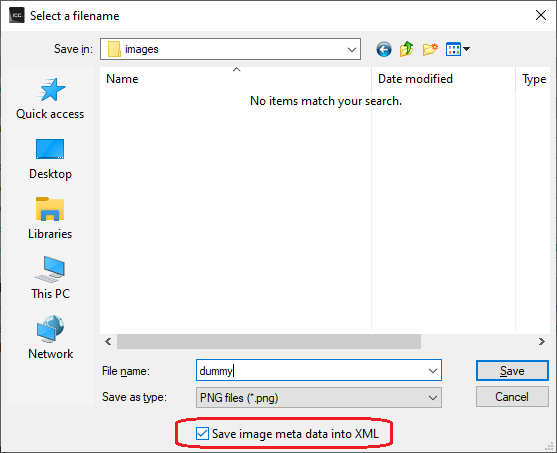
ImpactControlCenter offers a wide range of image formats that can be used for exporting captured image to a file. This can be achieved either via the menu: "Action → Save image..." or by right-clicking onto the image that shall be exported. See General Options also.
- Note
- To export an image the acquisition must not be running! It is possible to store images anyway but which image gets stored then is undefined since new images are coming in all the time.
Some formats e.g. like packed YUV 4:2:2 with 10 bit per component are rather special thus they can't be stored into a file like e.g. offered by the BMP file header. When a file is stored in a format, that does not support this data type ImpactControlCenter will convert this image into something that matches the original image format as close as possible. This, however, can result in the loss of data. In order to allow the storage of the complete information contained in a captured image ImpactControlCenter allows to store the data in a raw format as well. This file format will just contain a binary dump of the image with no leader or header information. However, the file name will automatically be extended by information about the image to allow the restoring of the data at a later time.
It is also possible to store metadata belonging to the image that is stored.

This will result in a small XML file with all metadata available for this particular request being stored with the same file name but a different file extension. Such a file might look like this
but might also contain more complex data depending on what has been delivered by a device.
Importing
All image formats, that can be exported can also be imported again. Importing a file can be done in 3 different ways:
- via the menu (via the menu: "Action → Load image...")
- by dragging an image file onto an image display within ImpactControlCenter and the dropping it there
- by starting ImpactControlCenter from the command line passing the file to open as a command-line parameter (on Windows® e.g. "ImpactControlCenter.exe MyImage.png" followed by
ENTER)
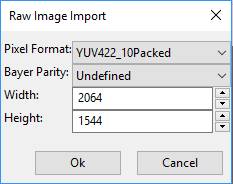
When importing a "*.raw" image file a small dialog will pop up allowing the user to define the dimensions and the pixel format of the image. When the file name has been generated using the image storage function offered by ImpactControlCenter, the file name will be passed and the extracted information will automatically be set in the dialog thus the user simply needs to confirm this information is correct.

