With the FFmpeg libraries it is possible to record an Impact Acquire image stream into a compressed video stream.
- Since
- 2.39.0
Requirements
Since the Impact Acquire API internally uses FFmpeg to record video streams, the FFmpeg libraries need to be present on the target system as well. They can either be built OR installed into the systems default library search path OR installed somewhere and afterwards an environment variable MVIMPACT_ACQUIRE_FFMPEG_DIR can be defined that points to the folder containing the libraries.
- Note
- Please make sure that you fully understand the license coming with FFmpeg! Have a look at the corresponding legal section inside any of the SDK manuals.
- Be sure to use a supported version of FFmpeg. Other version will no work!
Windows®
- Go to https://ffmpeg.org/download.html and download the dynamic libraries of FFmpeg (version >= 4.x) according to your operating system (e.g. 'ffmpeg-20200809-6e951d0-win64-shared.zip')
- Extract the *.zip file under '${MVIMPACT_ACQUIRE_DIR}/Toolkits'.
- Rename the file to 'ffmpeg-4.2.2-win64-shared'(64-bit)/'ffmpeg-4.2.2-win32-shared'(32-bit process on a 64-bit operating system) OR set an environment variable e.g. 'MVIMPACT_ACQUIRE_FFMPEG_DIR' which points to the folder containing the libraries.
Recording in ImpactControlCenter
In ImpactControlCenter, a video stream can be recorded by the 'Start', 'Pause' and 'Stop' buttons at the top right tool-bar. They are however inactive when the video stream recording mode is deactivated OR when the video stream is not correctly set up.

A video stream needs to be set up first to be able to get recorded. To do so:
-
Select the device to use and open it by clicking on the 'Use' button.
-
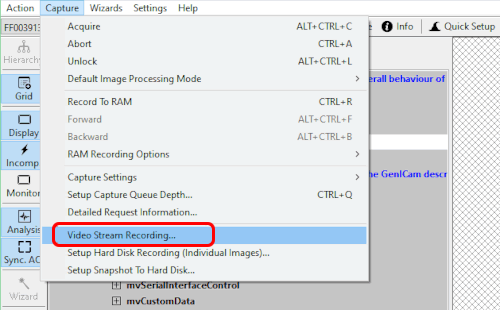
Navigate to the 'Capture' menu and click on the 'Video Stream Recording...' option to start a setup dialog. Figure 2: Click 'Video Stream Recording...'
-
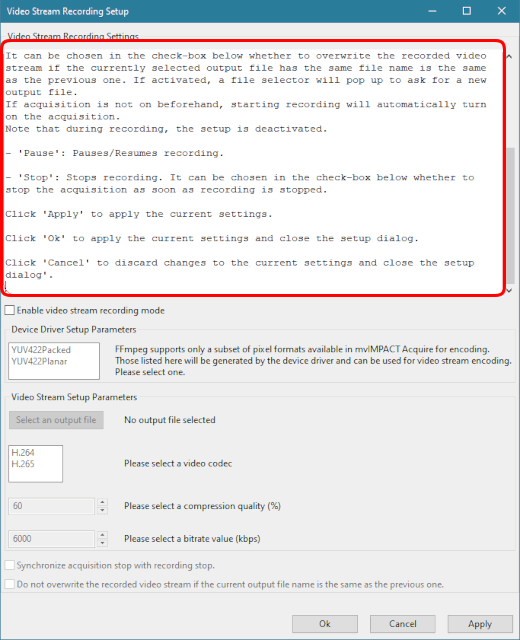
A setup dialog will then be initialized as follows. Please read the setup hints in the text box for more information. Figure 3: Video stream recording setup dialog
-
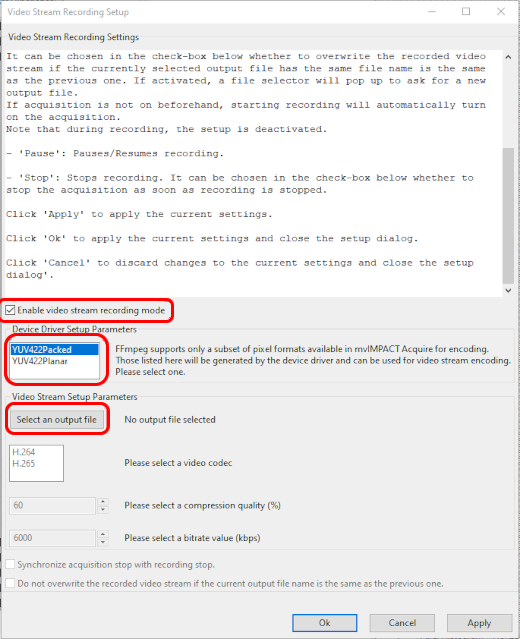
Enable the video stream recording mode. Choose a pixel format (e.g. 'YUV422Packed' or 'YUV422Planar') that will be generated by the Impact Acquire software stack and used by FFmpeg for video stream encoding. Then click on 'Select an output file' to create/choose a file to hold the recorded video stream. Figure 4: Enable the video stream recording mode and set up Impact Acquire software stack related parameters
-
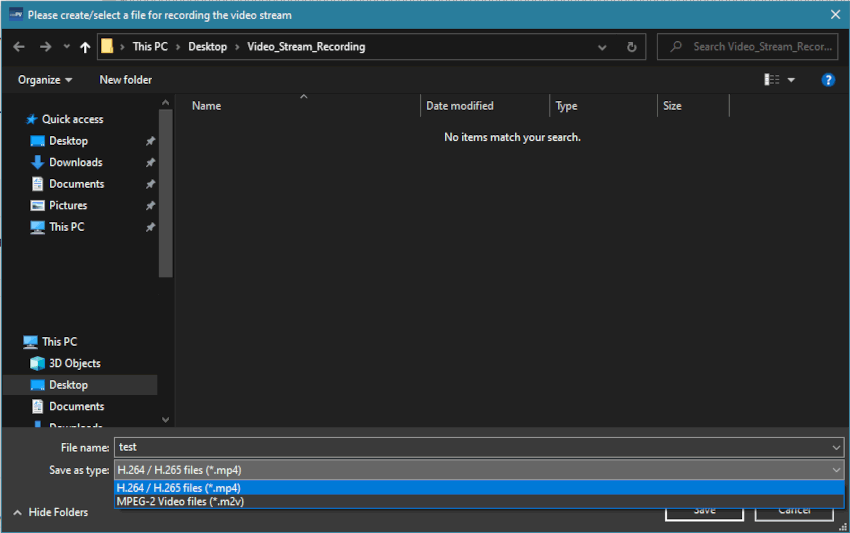
In the file selector, choose a file type (e.g. '*.mp4' or '*.m2v') and enter a file name. Figure 5: Select an output file
-
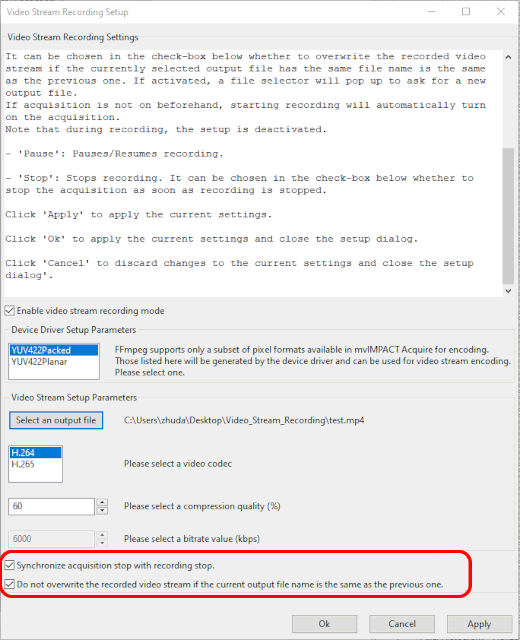
Set up video stream related parameters accordingly. In the check boxes below, users are allowed to choose whether to synchronize acquisition stop with recording stop and whether to overwrite the already recorded video stream if the currently selected output file has the same file name as the previous one. Figure 6: Set up video stream related parameters
-
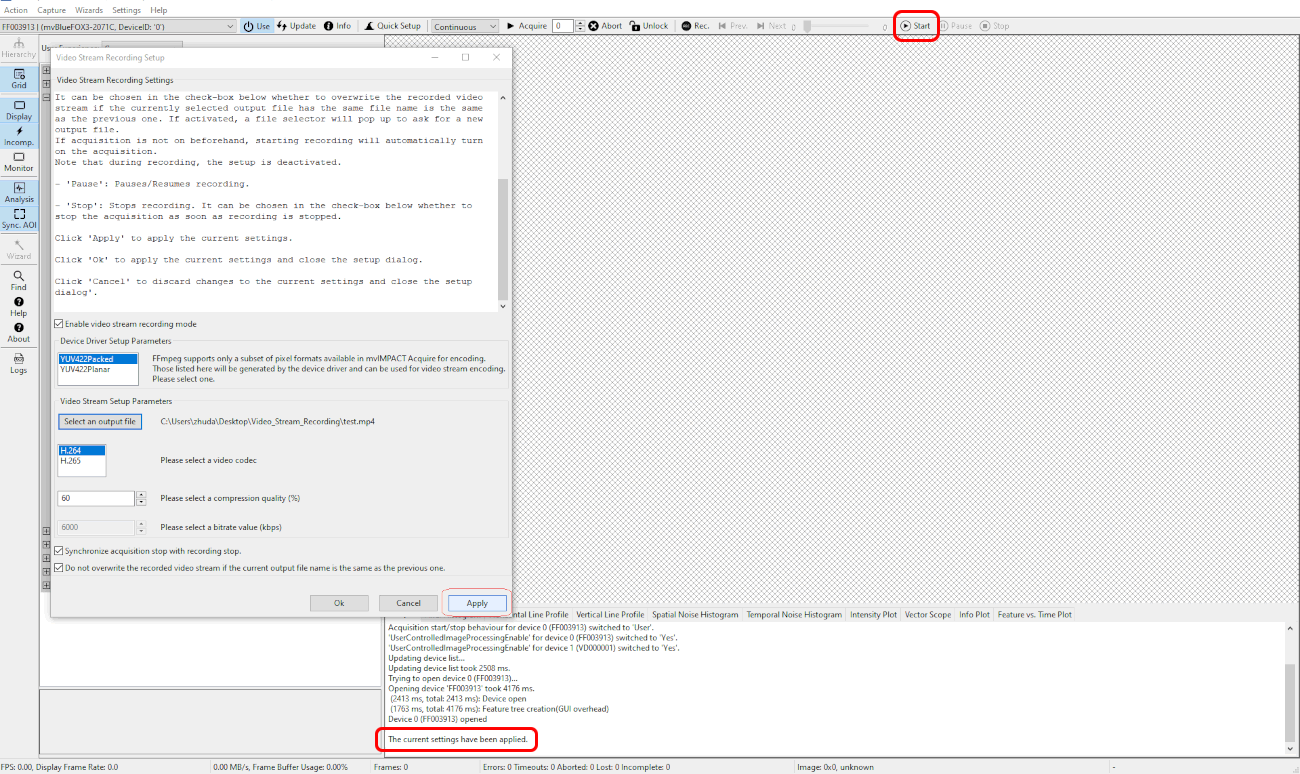
Once the video stream recording has been set up, click 'Apply' or 'Ok' to apply the current settings. Afterwards, a log message in the analysis output will indicate whether the current settings have been applied successfully. If successful, the 'Start' control button at the top right tool-bar will be enabled. Figure 7: Apply the current settings
- Note
- When deactivating the video stream recording, uncheck the 'Enable video stream recording mode' and then click 'Apply' or 'Ok' for the settings to take effect.
Once the settings have been applied, users can control the recording process via the 'Start', 'Pause' and 'Stop' buttons:
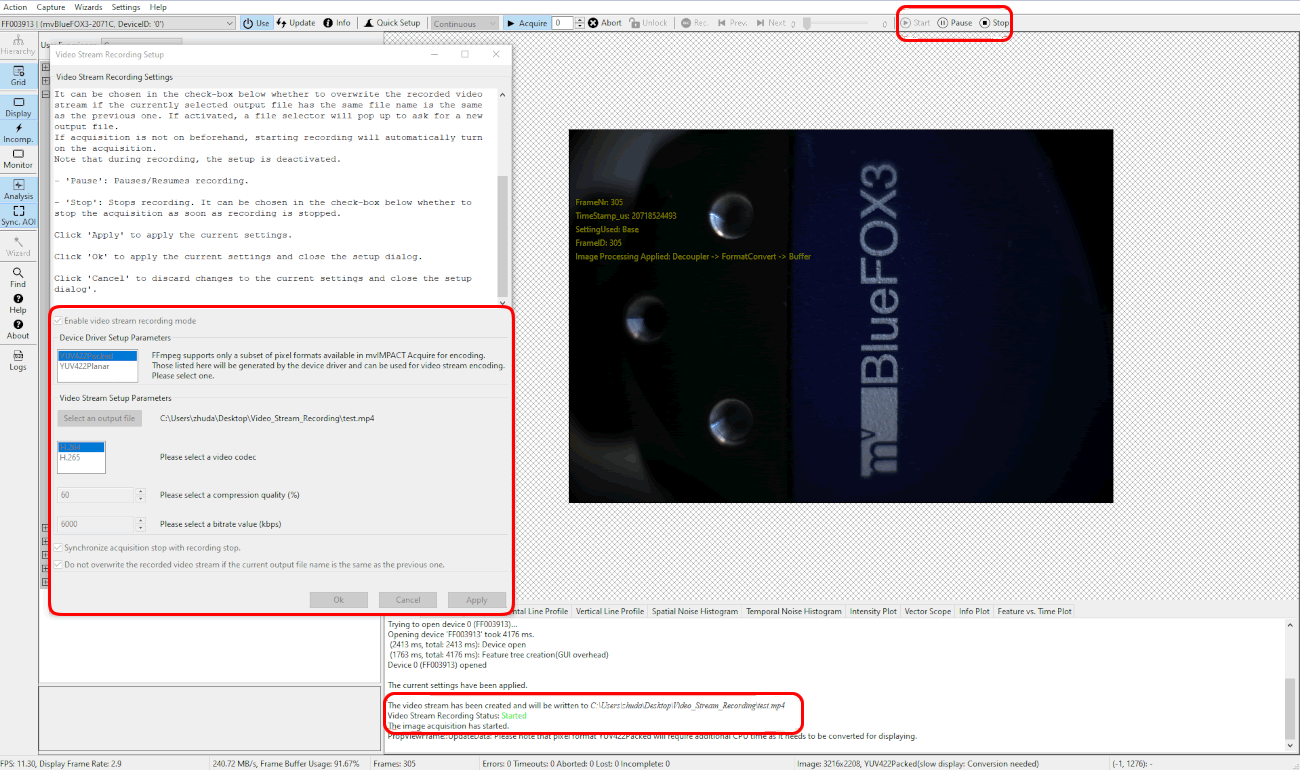
- Start recording: Click the 'Start' control button to start recording the video stream. The current recording status and information will be displayed in the analysis output. During recording, the setup dialog as well as the 'Start' button will be disabled. The 'Pause' and 'Stop' buttons will then be enabled. Figure 8: Start recording
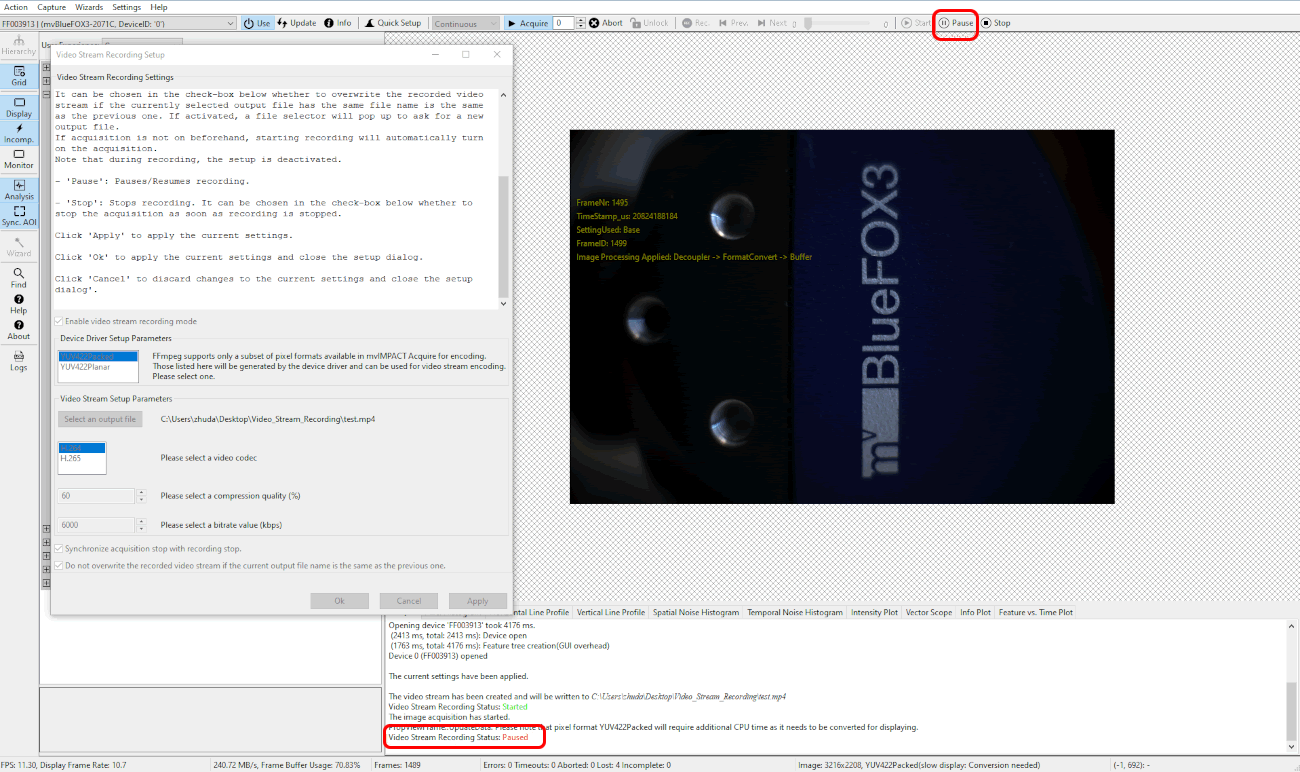
- Pause recording: Click the 'Pause' button to pause a running recording. The current recording status will be displayed in the analysis output. Figure 9: Pause recording
- Resume recording: Click the 'Pause' button to resume a paused recording. The current recording status will be displayed in the analysis output. Figure 10: Resume recording

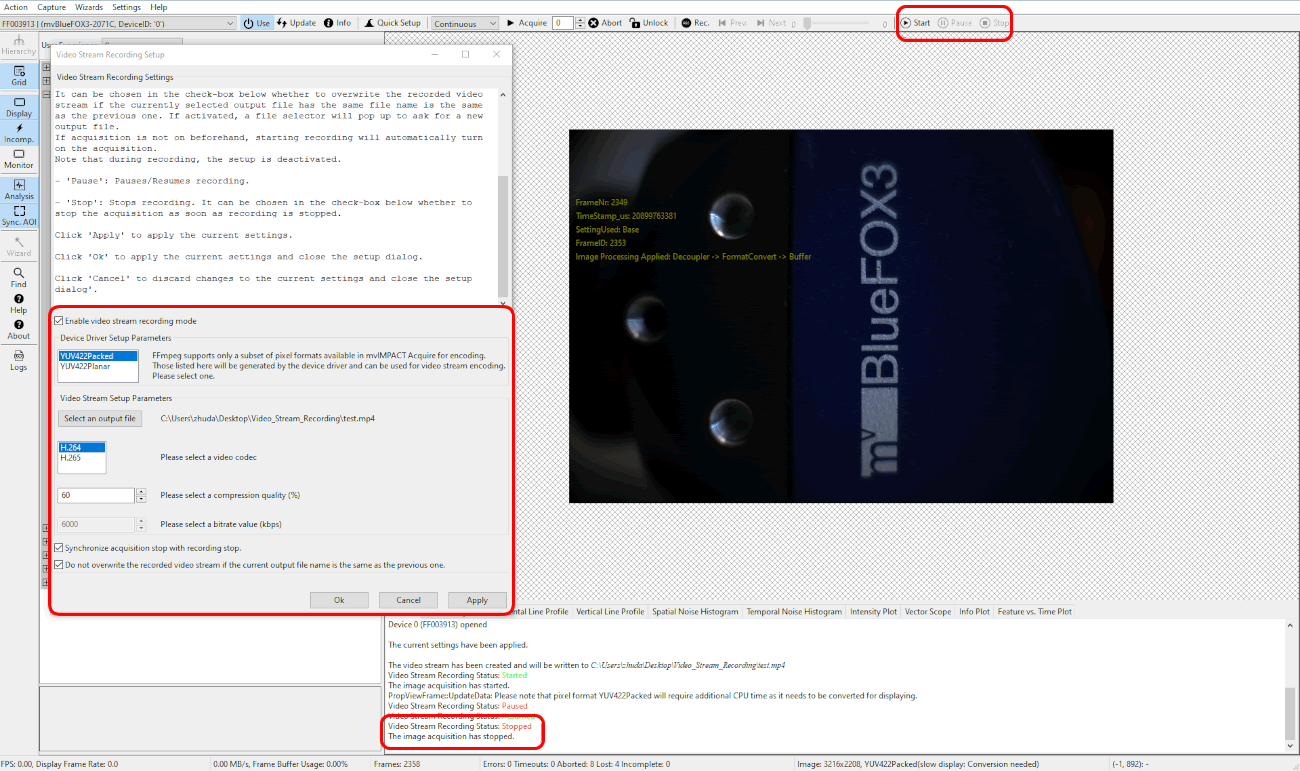
- Stop recording: Click the 'Stop' button to stop recording the video stream. The current recording status and information will be displayed in the analysis output. Once the recording has been stopped, the setup dialog as well as the 'Start' button will be enabled again. The 'Pause' and 'Stop' buttons will then be disabled. Figure 11: Stop recording
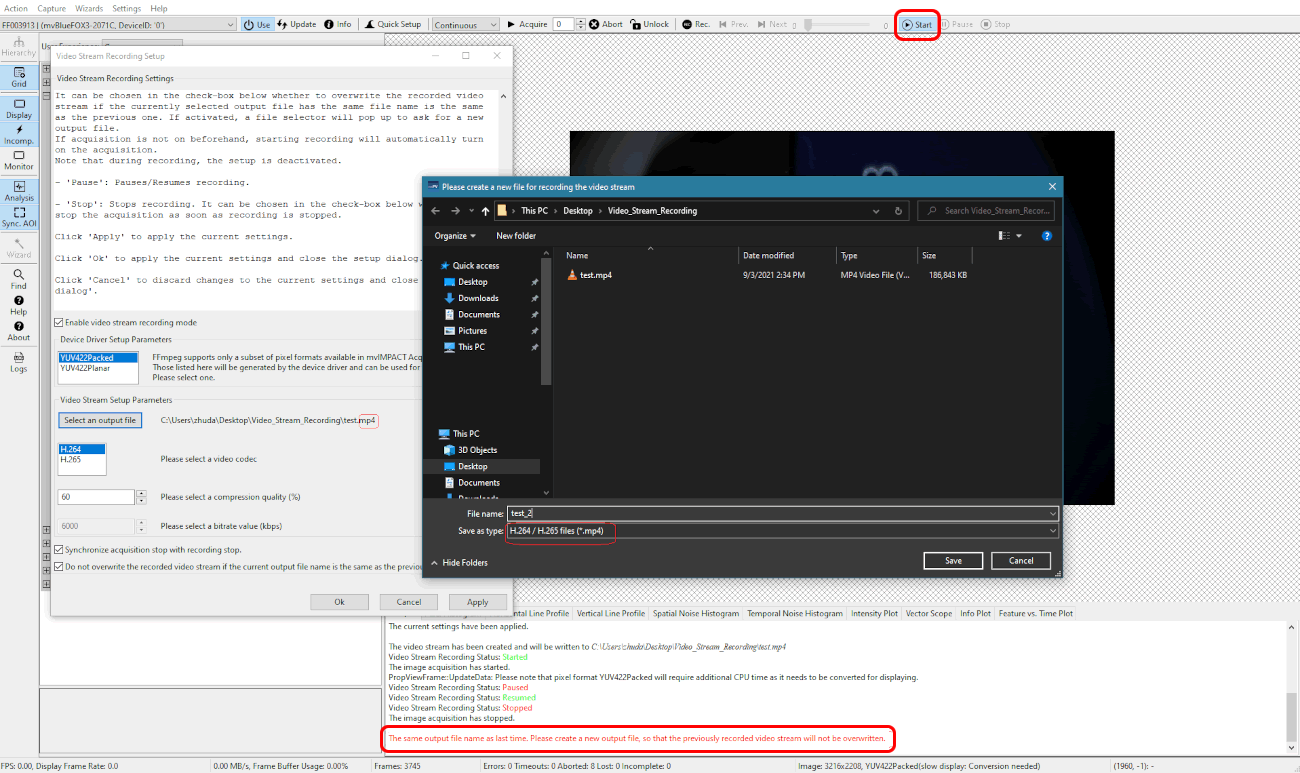
When recording to an output file which has the same file name as the previous one while overwriting the recorded content is not desired:
-
When clicking 'Start', a file selector will pop up to ask users to create a new output file with the same file type as the previous one. If a new set of parameters of the video stream recording is needed, please click 'Cancel' in the file selector and re-configure parameters in the setup dialog. Figure 12: Select a new file when starting to record to an output file with the same file name as the previous one without overwriting
-
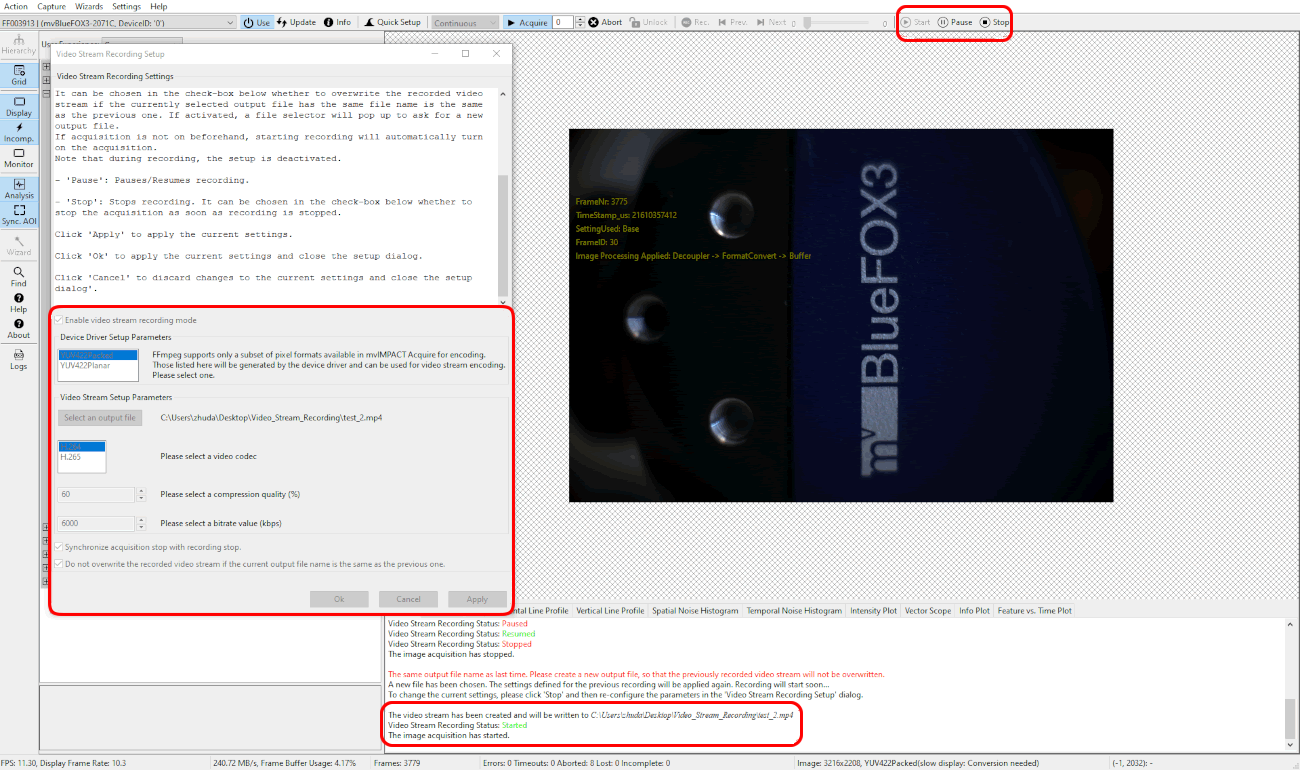
Once a new file has been created, the video stream will start to get recorded. The current recording status and information will be displayed in the analysis output. During recording, the setup dialog as well as the 'Start' button will be disabled. The 'Pause' and 'Stop' buttons will then be enabled. Figure 13: Start recording to an output file with the same file name as the previous one without overwriting
Recording Using The API
Please refer to the example on how to record a video stream using Impact Acquire C++ API: ContinuousCaptureFFmpeg.cpp or have a look at the VideoStream class.